A Pet Peeve

Alright, this is basically a rant with a how to buried in it.

Hats. Cover your head. If you’re doing Medieval, Pre-Medieval, all the way up to Victorian, recreation and your persona is in what they would consider to be public? Wear a hat. We don’t wear them modernly (except in special situations), and they’re entirely optional. So we tend to just…not, even when in persona. Please don’t fall into this trap.

No this is not a religious thing. I mean, yeah it can be. I do Saxon and it’s totally a religious thing by that point. Modesty before the Divine and all that. Frankly it’s just practical before it becomes a symbol of modesty. So all this “but my persona isn’t Christian so I can leave my hair uncovered!” misses the point.

Why you should cover your head, regardless of gender or religious choices:

  1. Sanitation.

Ok look, hair gets dirty. If you work outside in any capacity it gets muddy, and full of just random stuff. A head covering keeps all that off your hair, keeping it neater between washing.

2. Climate control/Burn prevention

I’m putting these together because they fall into the same basic category of comfort. Sun or wind burn on your scalp suuuuucks. The easiest way to prevent this? A thin layer of cloth over your head. Also, shockingly enough, a linen veil or cap is cooler than a bare head in extreme heat. That’s without factoring in that you could wet it with cool water and it becomes basically air conditioning. In the cold? An uncovered head is a heat dump. We know this, this is why we wear knit caps and hoods in modern winter. If you portray Northern Europe in the little ice age? A hat means you don’t get frost bitten ears.

3. Personal grooming

Pop quiz: if you have long hair and don’t use product in it to keep it in place, how often do you shove it out of your face every day? How many times do you tuck fly-aways behind your ears? Even if you tightly braid it. If you’re anything like me it’s frequent and unthinking. Know when that problem goes away? When there’s a cap or veil keeping it covered and in place. No more wind blowing long hair into your eyes, no lighting your head on fire trying to make dinner, no eating the tips of your hair while talking.

So what would you wear on your head?

I’m a Saxon, so I’m going to use my nifty new dummy head and purple wig to show you the layers I do and why.

Layer 1: Hair style

I do this braid/bun style because it uses one tie, gets all my hair, was found on a bog body, and fits neatly under all the other layers. Why is it purple here? Because I own three wigs, and the green and rainbow ones are curly so I’m not braiding them.

kimg05511154747720.jpg

Layer 2: Cap

This is optional-ish. Think of it like a hair bra. This gives me something to pin the final veil to and keeps my hair firmly contained. This is a fairly new addition to my garb and I have no idea why it took so long for me to start wearing it. It’s comfortable enough that I don’t notice it once it’s on.

Layer 3: Fillet

Totally optional. This is for form rather than function. Saxon tends to not be very flashy (see my comment in the beginning about modesty and all that). But this does give a chance for a nice pop of color and pattern, and the ability to show off your fancy tablet weaving. I’ve also noticed it helps keep my cap from sliding back if I tie it around my head (above) rather than under my chin.

Layer 4: Veil

Final layer! This is the most visible part. It covers my neck and shoulders, and keeps me from getting sun burn, no matter how long I spend outside. I actually wore only a veil for years and just pinned it to the front of my dress, looped it over the top of my head, and then pinned it to itself. That certainly works and is an entirely viable way of wearing a veil if you can’t wear the foundation cap for whatever reason (or if you forgot it). But wearing a veil this way is what gives veils like this their pain the butt reputation. They tend to slip back, or shift, and hair escapes, and your forever fiddling with it and adjusting it. And it can sometimes, annoyingly, just slip right off the back and then you’re getting stabbed in the throat with your own pins trying to fix it. As me how I know.

Samite

What, how, and dear gods why?!

Lets start out with what samite is. Samite is a compound twill, using two warp structures, to create a patterned fabric. At it’s heart that’s all it is. It is also one of the most luxurious, sought after, and valuable fabrics in history. Why? Because it’s a pain in the ass to weave and is generally done with silk and precious metal threads. It was also strictly controlled as a trade good. You couldn’t just go buy samite from anywhere, limited places were producing it (Assyria, Byzantium, and places owned by them were biggest producers) and that drove up costs.

samite
Figured samite showing common motifs

Traditionally samite involves a twill binding warp, and a core pattern warp (which ends up being completely covered by the motif being woven, much like a tapestry warp). The binding warp shows on the pattern as little dots, making it look over all like twill. Each color added to the over all design involves yet a more complicated pick up and treadling pattern. This would involve a loom that has multiple, almost an insane amount, of harnesses. I do not have that. I have an open 4 harness table loom. Which means being a wee bit nontraditional. But I’ll get to that in a minute.

All of the magic of samite happens inside the binding warp shed. Once that’s open you’re basically making tapestry on the pattern warp *inside* the shed of the twill. It’s super cool.

How this works (in an ideal world when you have enough shafts to not have to pick out your pattern):
-Open your twill shed.
-Open your first pattern shed, IE raise every thread that is NOT the color you are currently using as a weft.
-Throw weft 1 through the open pattern shed NOT between your pattern warp and twill warp.
-Close your first pattern pick NOT YOUR TWILL SHED.
-Open second pattern shed (if you’re using only 2 colors in your design this will be the inverse of your first pattern pick).
-Throw weft color 2 through the shed in your pattern warp.
-Close your second pattern shed.
-Repeat pattern sheds as needed (if you’re using more than 2 colors) until all colors in your design have been thrown.
-Close your twill shed.
-Beat into place, then repeat from the top.

If this sounds time consuming? Congrats! You’re right! It is! I’m averaging about 8-12 rows an hour. Not inches, rows. At this rate it takes me roughly an hour and a half to hour and forty-five minutes to weave one inch. And this is only doing one pattern repeat. BUT DON’T LET THAT SCARE YOU OFF! Seriously. If you’ve ever done any sort of pick up pattern before, you can do Samite.

As this is my first attempt I opted for only doing a 1 – 1.5in wide band of the stuff. Rather than actual yardage. Just in case I hate it. I warped a 2/1 twill using the first three harnesses, and warped all of my pattern warp through harness 4. This meant I could raise the entire pattern harness, pick out the pattern with a weaving sword, throw the pattern weft, then drop the pattern warp, pick out the ground with the weaving sword, and throw the ground weft, all without disturbing the 2/1 twill shed. I alternated threading a pattern warp and a twill warp for a ratio of 1:1 binding warp to pattern warp. I should have done a 2:1 pattern to binding warp threading since my binding warp came out too dense and ended up obscuring the pattern. You could probably take it down to 3:1 and it’d look just fine.

So what does that look like in plain numbers? For what I did here is my threading, 1,2, and 3 being white binding warp, 4 being green pattern warp:

1, 4, 2, 4, 3, 4

For what I should have done:

1, 2, 4, 3, 1, 4, 2, 3, 4

Yet a third option with less binding warp pattern disruption:

1, 4, 4, 2, 4, 4, 3, 4, 4

Because I did a 1:1 ratio my twill line is Very Very visible. Observe:

51895243_788335441505219_3394449693550313472_n

Those diagonal lines of white dots are where you see my twill binding warp. If I’d made it a bit less dense it’d be a bit less pronounced. If I’d made it the same color as my ground it’d be less pronounced, but I’d go utterly bonkers trying to pick the pattern out. So I’m left with this.

Because I’m doing this on a normal table loom, and doing it as a pick up pattern rather than loom driven, I am using a pattern designed for tablet weaving. You can do this with a cartoon (like tapestry) or a transparency if you’ve got one. I just work better from charts, so that’s what I’m using. It means I can count threads just like I would for knitting or cross stitch, and means I could, if I wanted to in the future, use any color work chart intended for knitting or cross stitch, in order to make samite.

Here is how I make samite happen, with pictures because otherwise this is useless.

  1. Lift appropriate twill harness AND harness 4 (pattern harness). Note how 1/3 of the white binding warp is now lifted and all of the pattern warp is up.
  2. Slide my weaving sword under any pattern warp meant to be ground color, and over any of the pattern warp meant to be the main design. Note that all of the twill binding warp remains in it’s original position of 1/3 over the weaving sword and 2/3 under it. You should never manually alter the twill shed, just create the pattern shed. kimg0525-1290272809.jpg
  3. Throw my design weft, in this case black, through the shed created by my weaving sword. This takes the weft under any threads that will be the background and over any threads that will be design. kimg0526-1683878052.jpg
  4. Remove my weaving sword and lower the pattern warp ONLY. I am leaving the twill shed open.
  5. Beat the design weft into place.
  6. Taking my weaving sword I am *lifting* any pattern threads (not twill threads) that are *under* my design weft from my last pick. Any pattern threads that go over the design weft will lay under my weaving sword. You’ll notice this is just the inverse of the pick we just did with the design weft. kimg0529247869476.jpg
  7. Throw my background weft through the new pattern shed created by the weaving sword. The pattern warp should now be completely covered by either a pattern weft or a background weft. kimg053075205318.jpg
  8. Remove my weaving sword, close the twill shed, and beat into place. kimg05331941769426.jpg

Then you start back at step 1.

A few things to keep in mind to make this easier on yourself:

  1. Pick different color pattern and binding warps. DO NOT attempt to use the same color for both. Your pattern warp color does not matter as your pattern warp is entirely covered by your design. Do yourself a favor and pick one with a high contrast to your binding warp.
  2. The higher your thread count the smoother your lines and more clear your design will be. The band I’m doing is 60/2 silk, and there’s roughly 50 pattern warp threads in that 1in-ish wide band. This falls in line with “coarse” and “low quality” samite found in Danish viking era graves. If you’re going to use coarser thread, like 20/2, go for a much wider band and get the thread count as dense as you can for your pattern warp so your weft has space to make clean lines. Otherwise you’ll end up with 8 bit samite. Which is cool if that’s what you’re going for! Not so much if it’s not.
  3. Samite makes thick and heavy fabric. Think about it. You’re using two warps, and at least two wefts. You’re going to end up with a fabric twice as thick as you would get normally. Make sure you select your yarn, and plan your project, with this in mind. If you want delicate trim for a neckline then you don’t want to use no. 10 crochet cotton, it’ll be too thick. Aim for quilting thread at most. If you want a samite belt because you’re just that fancy? Then 20/2 weaving yarn or no. 10 crochet thread is perfect.
  4. As with any color work choose colors with high contrast. Otherwise, as you see in my sample with the gold weft on the green and silver background, your design won’t show up as well. You’re weaving samite, leave subtle for somewhere else.


Weaving With Handspun

Dos, Don’ts, and dear gods why?

So lets say you’re a weaver. Looms are hungry beasts and this is an expensive hobby to have. Yeah it’s awesome, but looms aren’t cheap and neither is the yarn yardage required to make cloth happen. Especially if you’re trying to weave at a pre-modern thread count. Think about it, each inch wide piece of cloth for a one yard length at 50epi takes roughly 75 yards of thread for the warp alone. Add in the weft and that’s two spools of sewing thread for an inch of cloth. If you’re using something nicer than polyester quilting thread that adds up Super Fast.

Fleece, however, is dirt cheap compared to finished yarn. So you may start thinking of weaving with handspun yarn. You get a product that’s even MORE handmade, you can control the historical accuracy (or not) of your thread, and it just sounds super impressive. So lets take a look at getting started.

Do: Start with handspun weft and commercial warp.

Why? Weft is the more forgiving of the two. You don’t have to have as hard spun a yarn, or as perfectly spun, for it to produce a beautiful finished product. Weft isn’t under tension and isn’t being constantly abused by the reed, beater, and heddles.

Don’t: Start with handspun warp.

Why? Warp is constantly abused. It is extremely difficult to handspin a yarn that’ll stand up to that treatment without snapping. You can do it, most of human history did it, but it takes a skill set most modern spinners don’t quite have. Work up to this. Remember, even just a handspun weft increases your accuracy and the amount of the project you made yourself.

Do: Spin more than you think you need.

Unlike store bought yarn when you’re out of your handspun, you’re out. Yes you can spin more, but it’s difficult to get it to match exactly the longer you go between batches. Worst case if you spin too much? You have scrap yarn for making a scrap scarf, or naalbinding, or knitting with. You have options. Heck even just displaying handspun in a nice vase or bowl makes a lovely conversation piece.

Don’t: Forget to Process Your Yarn First.

There is nothing more frustrating than having a piece of cloth either be over energized (wrinkle and twist when you don’t want it to) or shrink way more than expected. You can cut down on this by prewashing your yarn and finishing it rather than just weaving with it right off the spindle.  I know it’s exciting and you want to get right to it, I’m guilty of this too. But it will make you happier in the end.

Do: Make Peace With Wonky Edges.

Your handspun is not going to be as perfectly even as machine spun yarn. You can get close! And the more you practice with spinning the closer you’ll get! But weaving shows every uneven point in your yarn. Accept it’ll happen, and either make peace with hemming, or embrace the wobble.

Don’t: Skimp on sizing.

Even if you don’t usually size your warp? Do it here. Handspun tends to be stickier and fuzzier than machine processed yarns, which means you’ll need help getting a clear shed. This is double true if you’ve decided to use a handspun warp. I use flax snot. Boil some flax seeds in water until it thickens up into disgusting feeling goop, strain the seeds out, and either soak your yarn or paint it on. It’ll give you a little bit of added protection to help your shed open cleanly AND help keep your warp from tangling and breaking so often.

Weaving with handspun is super rewarding if you ever get the bug to try it. If not? No worries! Keep on doing what you’re doing, hand weaving itself is beautiful! Spinning for its own sake and not to weave? Also awesome! I just hope this helped you out if you decide to combine the two.

Cheating For Costumes

You all know me. You know I have a Thing for being accurate. I feel like I’m cheating using metal needles at this point, let alone a sewing machine or inappropriate fabrics. This is not a post about that. This is about straight up theater costumes.

What do I mean by theater costumes? Not, surprisingly, costumes intended for theater, but rather outfits you make Just Because. You don’t have to justify them. Maybe you just want one outfit from a specific time period you don’t normally play in, maybe you’re making something for a friend who has a specific look in mind, maybe you’re doing something like the Birka fashion show and decide speed is more important that perfection. This is perfectly 100% acceptable. Do it up.

Lets talk about How. Yes my darlings there is an art to faking it and having it look right.

1. Patterning.

Look at your inspiration piece or pieces. What is most important to evoke the correct look? Is it the neckline? The skirt? The pants? The pattern of fabric? What needs to be there to have it have any hope of the final product passing for what you want? From there find modern patterns with similar lines to form your base. This’ll save you from drafting everything and gives you a solid place to start from.

You will need to edit your pattern. For example you can take a modern fantasy pattern and use it to make the structured bodice for Italian ren, so long as you trim off the bits that don’t look right compared to your inspiration piece.

2. Know what corners you can cut.

Are you planning on wearing this once? Indoors? Screw it, get cheap synthetic fabrics that look right. You don’t need it to breathe if you’re not worried about over heating. If you are worried about over heating? Spring for cotton. Does it need to be supportive? No? Awesome, use plastic boning and just make sure you can wear modern underwear under it. Can you get the right shape without multiple layers? Cool, sew what look like under garment sleeves right onto the outerwear. Will you see the fastenings? No? Now is the time for machine button holes and/or metal grommets (don’t use them anywhere they’ll be seen please. Nothing screams ‘deadline’ or ‘lack of fucks’ like metal grommets). Only going to see about 6in of what should be a full additional dress? Only make those 6in and pin them into place.

3 Machines are your friend.

Seriously. Machine stitch every bit you can. Don’t have a serger? No problem, finish those seams by running a wide zig zag stitch over the raw edge of your seam allowance. If this is for a one shot, or a just for fun situation then no one is flipping your seams. And if they are then they have other things they could be focusing on rather than how your seams were finished.

4. Safety Pins Hide Sins.

Making a German gown but can’t get that front stomach portion to stay up or closed? Pin it to your bra. Don’t have time to sew in ties for 14th century fancy sleeves? Pin those suckers in. Missed sewing in a button? You guessed right, pin it.

5. Know where you need to do it Right.

Yes you can cheat on damn near everything. But there are places you Have to do something correctly or by hand. Either it’s a fairly blatant spot (like eyelets down the front of the gown) or something your machine just isn’t designed for (like stitching down pearls). When you get to these spots it is just So Much Faster to just do it by hand than it is to try and make up a solution, get frustrated, then do it the way you should have in the first place.

Are there more tips? Yup! Sure there are! Ask anyone how they cheat on quick and dirty garb (my favorite is bias tape as hem treatments) and they’ll have a trick or two. But remember, these won’t win you any accuracy awards. So don’t do them all the time, yeah?

Birka, a year later

Birka was this past weekend! This is not a post about that. This is a post about last Birka. Yup. That’s how on the ball I am about these things.

So last year my dear friend Antonii was getting knighted. I’d called dibbs on either writing his scroll or heralding him into court before this was ever a concern. However someone else also called dibbs. When Antonii got his writ he approached us both and told us to fight it out and sort it between ourselves. And sort it we did. Sir Ryouko’jin of the Iron-Skies and I determined the only proper way to settle this was a Japanese vs Saxon poetry rap battle.

Picture if you will, an over six foot tall man wearing a Japanese straw raincoat and hat. Striding in before a line of impressively dressed people, speaking at a volume that demands attention.

Ryu:

Among island ducks
At rest lay the wolf of black
Schooled by skulls of three
Raised through banquet and battle

A future proud and true
The wolf on crusade
Bound to wills not his heart
Found his way westward
Bathing in its radiance In the sun of the faithful.

And then in the middle of this impressive display, one very tiny Saxon woman steps in front of the throne, hands on her hips and does the poetic version of ‘sit down before you hurt yourself’. Because I have shitty self preservation skills.

Me: Paltry and pale / the Praise you give!
Be still, whilst I / Speak his wordfame.
When wolf wakes the sky / weeps in his path,
Conqueror now / Comes before you.

Ryu:
Now Tempered steel
Son of Boar and Dragons Claws
The Tyger, the wolf
Carries the storm within his blade
Prince of Mists the Rainbringer!

Me:
Heavenly Helga / He ruled beside.
Brows bound in / bright Mist-ring.
Honor of East / Upheld and prized
Defended by /Foreign shore prince.

Ryu:
Now conquest his name
He returns in full vanity
Besting fellow wolves
Champion to Tyger kings
Proof, best let sleeping wolves lie.

And that’s how you settle a ‘who is boasting this guy in’ dispute. And then promptly forget to do the write up until a year later.

Iron Age Processing and its Effects on Yarn Production

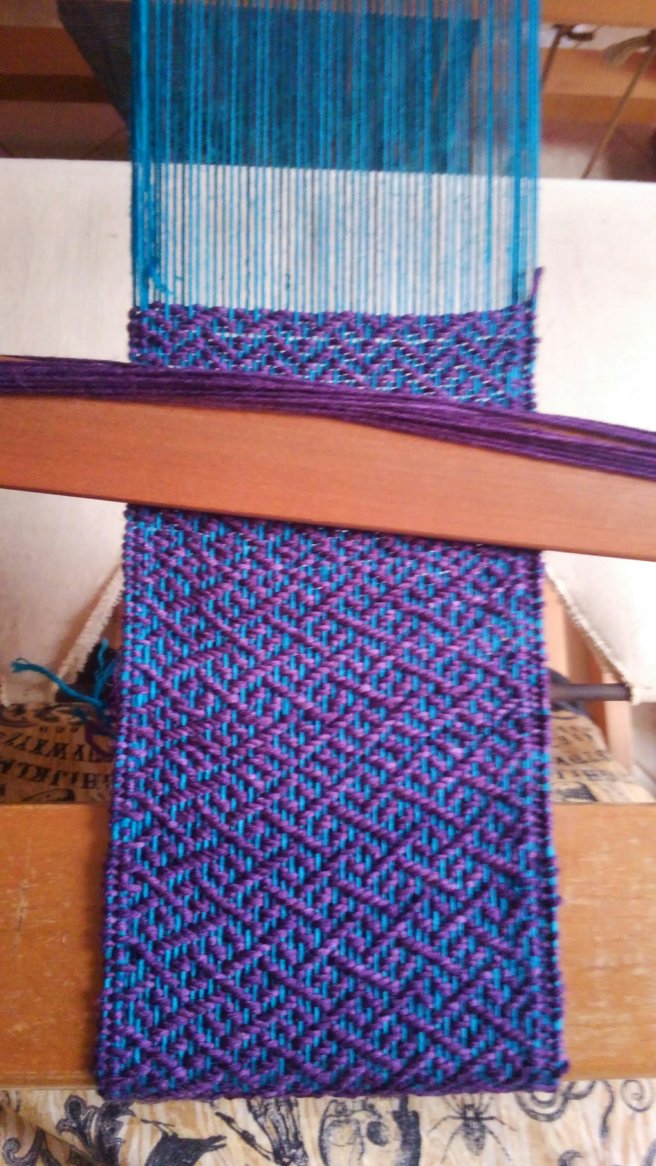
As I said in my last post I was spinning for a rather large project. Here is the paper to go with the yarn for that project as it was presented this past weekend. This is not the full project and I will post that paper once the project is completed. 


The purpose of this paper is to discuss my attempts at recreating an authentic Iron Age wool thread, as well as explain the differences in yarns produced on an Iron Age spindle vs a modern spinning wheel. All wool in this experiment was processed in the same manner and from the same fleece. The only altered variable was the tool used to spin the fleece into yarn. I will begin by explaining my choice of fleece, the steps used to process it, with archeological documentation for why I made the choices I did, and finish by comparing spindle spun to wheel spun yarn.

I am attempting to recreate an Iron Age yarn, like those that have been unearthed in Greenland and Birka. In order to get as close as possible to extant yarns I chose to work with a primitive sheep breed whose ancestors would have been available in Denmark and Greenland. Namely the double coated Icelandic sheep. It is, unfortunately, impossible to get a fleece identical to what would have been available in period. All sheep have undergone centuries of selective breeding to produce more favorable fleeces or meat, but primitive breeds are the closest we currently have access to.

I selected Icelandic specifically because of its dual coat. Greenland and Icelandic textiles, specifically those referenced in Woven into the Earth, show several extant cloths woven with the coarse outer coat used to spin the hard and smooth warp threads, with the shorter and softer undercoat used as weft. This serves several purposes. The most pressing being a cloth that is strong while still being warm and able to be fulled, or lightly felted. Using the top coat as warp reduces the chance of breakage, and the long staple length compared to the undercoat means a smoother, harder, yarn can be produced without additional effort.

I also needed a fleece that was cut from the sheep, rather than rooed or shed. There is a notable difference in the quality of wool depending on how it was taken from the sheep.  Primitive sheep actually shed their fleece, alternatively it can be cut or rooed (pulled) from them at the end of the season. Modern sheep have lost this ability, making them more dependent on humans, but also producing longer staple fiber. Initially I was intending to find a fleece that had been rooed. However examining wool from Birka shows no root ends in the yarn, meaning the fleece had to be cut from the animal, not shed – therefore I went with a fleece that was sheared from the sheep.

These yarns are, on average, woven into fabrics that are between 14-22 ends per inch, or 30-50 wraps per inch for the warp threads for wool twills. Highly prized Vidmal cloth produced in Greenland has a higher weft density than warp density, and therefore has a weft one third to one half again as dense as the warp. For this project I have chosen to aim for the coarser end of Iron Age yarn, with a warp of 30 wraps per inch, and a weft of 45 wraps per inch.

For the actual fleece processing I purchased a raw (unwashed, uncombed) full Icelandic fleece from a breeder who does not coat their sheep. In the period I am attempting to recreate we have no documentation for sheep coating, therefore I wanted to avoid it. This meant the fleece I began work with was covered in dirt, vegetable matter, and dung.

To clean the fleece I opted to rinse it in the stream behind my house. We have later period references, mostly in art, of sheep being run through streams to remove the worst of the dirt prior to shearing. This practice continued in Australia and more remote parts of Northern Europe until the mid to late 1800s. Therefore it is reasonable to mimic this practice. To that end I placed chunks of dirty fleece in a strainer and dragged in through the running water. This allowed the water to flow through the fleece, and the dirt to be carried downstream. I then allowed the fleece to dry in the sun.

The benefit to this vs modern scouring methods is that quite a bit of lanolin was left in the fleece. This made the wool more sticky and difficult to spin, but also made it stronger and therefore will make the resulting yarn easier to weave and more water repellent.

After washing the fleece was dragged through wool combs to divide the top coat from the undercoat in order to produce the top coat warp threads, and undercoat weft threads. The top coat was then combed again in ensure all the fibers were lying in the same direction. This was to produce a worsted spun yarn. Worsted yarns are smoother, harder, and less warm than woolen spun yarns. The smooth and hard nature makes them perfect for warp threads, and indeed is the method of spinning most often seen in Iron Age textiles.

Here we begin the deviation in tools and processing. Up until this point the entire fleece received the same treatment in order to minimize variables and ensure the difference in finished yarn, if any, was due to which tool was used to spin it.

I was only able to achieve a worsted spun top coat yarn using the Iron Age spindle. My wheel could not achieve the amount of twist required with enough take up to wrap it around the bobbin. Therefore attempts at recreating an Iron Age warp yarn on a modern spinning wheel was a failure for me. My yarn kept either being too thick to be a proper replica, or pulled apart due to insufficient twist.

The spindle however allowed me more control over the twist, which meant I could achieve the thinner yarn without it falling apart. I was able to mildly over spin the long top coat fiber, so that when plyed the result was a strong, balanced, yarn that was consistent in thickness with extant finds.

I was able to produce a yarn with the undercoat on my spinning wheel. However the yarn produced was not even, nor was it fine enough to be considered a replica of the yarns found in Birka or Greenland. Adjusting the take up and spin speed did not correct the issue as the wheel needed to take the thread up faster than the correct amount of twist could be applied. The result is a very fluffy yarn that would be excellent for naalbinding or modern applications such as knitting, but would not produce the textiles found in Iron Age graves.

As with the warp yarn the issue of spin vs take up was solved when a spindle was used rather than a wheel. The spindle was able to produce singles consistent with those found woven into textiles in grave finds with far less effort than was applied attempting to recreate them on the wheel.

It is possible to create a thin enough single to fall within the acceptable size range using wool on this spinning wheel and get a consistent thread. Therefore it is not user error or being unfamiliar with wheel spinning that is causing the difference in yarn produced. However, that was achieved with commercially prepared top using modern fiber processing methods suited for hand spinning on a wheel.

Using fiber processing suitable to the Iron Age produces a fleece that is difficult to spin using a modern spinning wheel, but causes no such difficulties on a spindle. There is a marked difference in the yarns produced, even when controlling for all other variables. It is my conclusion, that in order to produce a textile that is on par with those from extant finds the yarn should be spun using a drop spindle.

Sources:


Barber, E.W Prehistoric Textiles.  Princeton University Press. 1991.


Chisholm, Alec H. The Australian Encyclopaedia. 8. Sydney: Halstead Press. 1963. p. 86. Shearing.


Fournier, Jane and Nola. In Sheep’s Clothing: A Handspinner’s Guide to Wool. Interweave Press 1995.


Ostergaard, Else Woven into the Earth: Textile finds in Norse Greenland. Oxbow Books 2004.


Nosch, Marie-Louise, Feng, Zhao, and Varadarajan Lotika. Global Textile Encounters. Oxbow Books 2014


Strand, Eva A. Tools and Textiles – Production and Organisation in Birka and Hedeby. Viking Settlements and Viking Society Papers from the Proceedings of the Sixteenth Viking Congress. 2009.


Vedeler, Marianne. Silk for the Vikings. Oxbow Books. 2014.


Walton, Penelope Textiles, Cordage, and Raw Fibre from 16-22 Coppergate https://www.yorkarchaeology.co.uk/wp-content/uploads/2015/08/AY17-5-Textiles-Cordage-and-Raw-fibre.pdf


Spinning Yarn

This is not a how to. This is a comparison post.

I’ve spend the last month or so spinning for a rather massive project. Also writing the paper to go with it. I’ve been busy, just not updating the blog to keep you lovely folks in the loop. The finished project is for a competition so I’m not posting all the details on that here (yet), but here is one of the pieces of it.

For most of us handspun yarn is handspun yarn and needs no further documentation. “I spun this” is impressive enough. AND IT SHOULD BE. I’m just the batshit Lady of the Tangleweb region of the Land of Extra and have no idea how to tell the scope creep imp to buzz off. Therefore I decided to see if I could recreate the most identical to extant yarn possible, using only tools available to an iron age textile artist.

Originally I was just going to spin with my extant spindle whorl that was dug out of the ground in the Ukraine and dated to roughly 850-900CE. That’s within 50 years of when I say my persona is, and from a region we know Saxon England had contact with at that time by virtue of both being the hot spots to go a Viking. So it’s reasonable to assume my little spindle whorl is comparable to those Aethelflied would have had access to. If not, it’s still an extant whorl, not a reproduction.

Then I thought, if I’m using the extant whorl I need to use an appropriate breed of sheep. And if I’m doing that then I should make sure I get it raw so I can process it correctly. So I bought an Icelandic fleece, rinsed it in a stream, picked the VM out, and proceeded to separate the top from under coats using wool combs.

NOW  I can start spinning.

First I combed the top coat so I could spin them in a worsted style. Namely all the fibers going the same direction. This is consistent with records of later period English woolens and textiles from finds in Greenland and Birka to the same era I’m attempting to recreate. On the spindle spinning like this produced a very fine, very smooth, very hard, yarn that I think will stand up just fine to being warp threads.


On the wheel… well not so much. I couldn’t generate enough twist on the wheel to hold the top coat yarn together. Trying to set the take up as low as possible, to generate enough twist, just ended up with the yarn plying back on itself and twisting too much fiber into the yarn. Trying to set the take up faster just meant the yarn didn’t get enough twist and just kept pulling apart. Could just be my own inability to properly spin with a wheel, but there are also English records about the time of the spinning wheel’s invention stating it could only be used for weft yarns, as the warp yarns were not strong enough.

The weft yarn was produced out of the fluffy undercoat that was carded and spun woolen style (all the fibers laying all willy nilly). This makes a softer, fluffier, and warmer yarn that worsted style spinning. The mixed spin style and fiber prep is referenced in a couple of different finds, namely Greenland, Birka, and Osberg. There are also references to finished fabrics being teased, or fulled, to raise a nap. That’s basically felting. Worsted yarns are much Much harder to felt than woolen spun. So for fulling to be a common practice the weft, in the very least, should be spun woolen style.

My first attempt resulted in yarn that was too thick. Not because of any tool issues, just because my hands are dumb some times. I should have gotten a yarn roughly 14-16 wraps per inch, and ended up with a yarn closer to 8 after I’d plyed it. Stubbornly I dyed it and tried to convince myself it was fine since the point of the project was to use the tools, and it was getting fulled anyway, so no one would know.

I would know.

I’m respinning my weft and getting much closer to what I wanted.

For the sake of comparison I also spun some of the undercoat on the wheel, using the same prep as I did for spindle spinning. It is a lumpy bumpy mess when I try to spin as fine as I need. I ran into the same take up vs twist issues as I did with the longer top coat. Only the undercoat is so fine and short that setting a higher take up just ripped the fiber out of my hands faster than I could add more fluff. It was easier than working with the top coat, but I did need to create a much thicker yarn to make it work.

My conclusions here are that, at least for me, I can not substitute wheel spun yarn for spindle spun if I am aiming for historical cloth. The difference, in my own handspinning, is painfully apparent.

Coats for Saxon Women

Are pure conjecture. As are coats for Danish, Norwegian, Finnish, and other Viking cultures. There I said it. We’ve got evidence for coats! We do. We have carvings on the helmet at Sutton Hoo showing warriors wearing what look like (to my entirely professional and serious eyes) fighting bathrobes. Observe:

Bathrobe of death

Note how they are crossed in the front and belted as opposed to clasped closed. We also don’t see this kind of garment on civilians or figures that are clearly female. I say clearly female because women fought too damnit, so they *might* have worn something like this, but not in a peaceful context. If you’re fighting and feel like making a killin’ robe you go right ahead, and feel free to stab anyone who complains that you’re in men’s wear. I mean, you’re already dressed for stabbin’ it’d be a shame for that to go to waste.

And so ends our solid documentation for jackets at all in this era. Everything else is conjecture. Not entirely baseless conjecture! We have things like brooches at throats, or mid chest. The issue is those could also hold closed shawls, wraps, or cloaks. The point is we’ve got nothing to support the very popular style of coat that’s cut close to the body, comes to about mid-calf, and is pinned closed mid chest but otherwise hangs open. For an image use your search engine of choice and look up ‘Anglo Saxon Women’s coat’ and you’ll get examples. Because we lack period images everything that comes up are private photos, and I’m not cool with putting some random person on my blog for the sake of saying their clothes are unsupported. That’s just rude as hell.

All that being said? Early period textiles are conjecture. From weaves, to colors, cuts, styles, materials, we’re making educated guesses. Our body of extant items is small enough that we *have* to guess. I can’t really support apron panels as a separate garment for Viking apron dresses, but they make sense and are pretty and plausible. We’ve got no clue how long under dresses were for Saxon women, or what color. We’ve got a couple images of the Virgin Mary looking like she’s wearing two different dresses, one shorter than the other. So we run with it. Necklines for women? Who knows! Veils, shawls, and the like cover them in every image we’ve got.

Coats for women make more sense to me than shawls and cloaks. Women worked and worked hard. It makes very little sense to navigate fire, looms, spindles, and the other day to day bits of womens’ lives while trying to keep a shawl or cloak wrapped around you to stay warm. I’ve done it. Trying to spin in a bulky cloak becomes a balancing act with sudden, jarring, bursts of cold air. Weaving on a warp weighted loom knocks the shawl off when you beat the weft up. Tending a fire with that much loose fabric, while entirely possible, is a pain. Those who came before us were not stupid. Coats with sleeves were, and are, an elegant solution to these issues.

Now, what about style? What arguments can we make here? Honestly the close fitting coat doesn’t really hold up. The style of it does! Just not the body skimming nature. You want a baggier coat for trapping more air between the layers to stay warm, and to easily cover whatever you’re wearing under it. Otherwise, what’s the point of a coat at all? A clasped in front cloak does make more sense for a woman than the crossed over warrior coat when you factor in baring children. A coat with a single clasp over the chest wouldn’t change how it fits or hangs over a pregnant belly like the crossed warrior coat above. If it’s baggy as opposed to body skimming (as I am arguing it should be) it could still cover the belly without needing to be remade or worn with additional bits and pieces. Breast feeding would be easier in the crossed over coat, it’s true. But it would still be easier in a baggy clasped coat over redrapping a shawl or cloak. A baggy coat just needs one clasp undone, baby tucked in, and the edges pulled back over mom and child.

In order to test my theory on ease of wear for a baggy clasped coat, I made one yesterday. It is quick and dirty (and ugly as sin to modern taste) but this sucker is *warm*, even being made out of a very light weight wool. It’s warmer than my modern winter coat. Which makes me mad because, again, this thing is ugly. But! It is a period herringbone twill, in all natural wool colors (plus blue and white twill edging, but the blue is a color we can produce with available dyes in period) and a plaid-ish pattern. With a thread count we’ve found in extant scraps. So it may be ugly as sin, but it’s documentably ugly.

I’m going to wear this thing next weekend to Falling Leaves and get joy out of the looks of horror.

kimg03411534893840.jpg

Leg Wraps

A couple of years ago, in the beginning of this blog, I talked about making leg wraps for my husband. I mentioned that I didn’t care for the ace bandage style, mostly because I hate hemming and making those would involve approximately 86,000 years of hemming.

Now I have a floor loom. And the ability to weave complex braided twills. So now I weave leg wraps in a more traditional style. Well “traditional” anyway.

I have found no documentation for this particular pattern of twill, or even braided twills in general. Diamond, broken diamond, 3×2, 2×2 (less common)? Yes. Those patterns we have evidence for. This? Not so much.

The colors are also not period at all. But the person for whom they are intended picked the colors out himself and I’m not about to tell a guy who likes colors no.

I had to learn how to weave wool for this. I’ve only really worked in silk, and wool behaves Very Different. Initially I was getting almost a tapestry weave where the weft completely covered the warp because I was beating too hard and had it under too high of tension.

So here is my current project. 4 harness braided twill, roughly 10 epi warped, will wash out to about 12-14 epi. 9 yards finished length, or 4.5 yards per leg. About 13 picks per inch.

Day 7: Lamb and honey mustard sauce with barley pilaf

I am never making a rice pilaf again. Barley is where it’s at. Holy mother of tacos.

So barley pilaf is amazing. It’s the perfect mix of savory and sweet thanks to beef broth, salt, and cinnamon. A generous helping of butter makes this rich and creamy and stick to your ribs filling. This my darlings. This will be my winter comfort food.

Originally the book called for sauteed radishes in here as well. I… didn’t have anymore because I got excited and used them all earlier in the week. But I can picture the crunch and bite they’d give this and it is divine.

Lamb? Lamb was pan seared in butter, kosher salt, and garlic and friend of mine grew. I then topped it off with a honey mustard sauce (honey, yellow mustard, white wine vinegar, cinnamon. I used horseradish prepared yellow mustard because I wanted bite). Om nom nom.

Most sauced lamb I’ve eaten has had a very classic mint sauce, or a sweeter BBQ sauce. That tends to mask the musky taste lamb can get. This? This drags it out, plays with it, makes it a counterpoint to the mustard bite and really is a perfect pairing for the rich and creamy barley.

I am so glad I chose to end my week of eating like a Saxon with this meal. This? This was an utterly perfect way to go out with a bang.